 Topic: Materials & Rendering
Length: 10-20 min
Difficulty: Easy
In this short tutorial you will learn how to render 3d models in 3ds max into 2D manga looking images with cell shading. You will learn how to create an Ink & Paint material and how to set up the renderer to render cell shading.
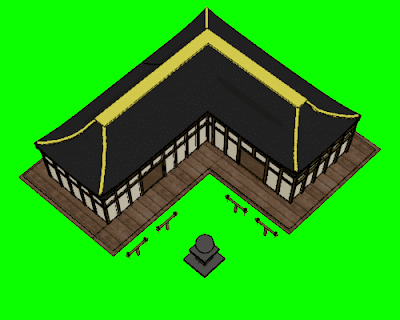
Above is an example of cell shading on a japanese building. I made this image for a small scale strategy game using the method of cell shading.
Note: If you already have a model that you would like to cell shade please skip step 1.
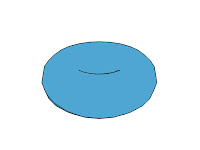
Step 1: For the purposes of this tutorial we're going to use a simple torus shape to practice cell shading. First create a Doughnut in your perspective view from the standard primitives rollout and make it look something like this one below. If we were to render this now it would look quite plain and boring, but we will soon fix that.

Step 2: Now open the render scene dialog box and check the radio button at the bottom of the window that says Activate shader. This will allow the render to render the cell shading properly. It is also a good idea at this time to change the render background to white so that the outline of the doughnut will be visible. (rendering - environment and change background colour to white)

Step 3: Now it's time to make the material for your immensely complex doughnut. Open the material editor by pressing m. Now we don't want a standard material so click on standard and from the choices in the dialog box that appears choose "Ink & Paint". Now you should have a basic cell shader material that is blue by default as shown in picture 3 below. Apply the texture to the doughnut be either dragging and dropping or by clicking the 'Assign Material to Selection button'.

 Step 4. If you were to render the image now it would come up something like this on the left. As you can see this is not very convincing and more tweaking is needed to make it more 'cartoonistic'. (Note: For cell shading to render properly it must be in a perspective or camera view or else it will not work properly)
In the paint control rollout of the material editor, set paint levels to 3 and check the box that says highlights. This will add an extra level of shades for a 3d look and highlights to show reflectivity.
Render the image by pressing ctrl-Q. As you should notice the quality of the image is improved a lot just by doing these two small things. For most cell shading only 3 paint levels are needed but you may want to try more for whatever reasons. Play around with the paint levels and see what happens when you render the image at 4, 5, 6, etc paint levels.
You can also change the colour of your object here by clicking on the colour swatch at the top of the rollout and choosing a different colour.
Step 5: Step 4 may be as far as you want to go but from now onwards you may want to tweak your cell shading to get the affect that you want most. In the paint rollout change the shaded value from 70 to 30 and render the image. Now change it from 30 to 0 and render it again. As you probably noticed, this increases the darkness of the of the rendered image. Change this value until you get the look that you want.
 Also change the glossiness value as well. Set it to 0 and render it. Then set it to 80 and render it. The higher the value in this box the smaller the highlights and, likewise, the lower the value, the bigger the highlights.
Step 6: We'll leave paints for now and go onto ink controls. Just scroll down to the ink control rollout on your material map editor and have a look. Most manga and cartoons utilize variable pen line widths to make the art look better and 3ds max has this function as well. Check the box that says 'Variable width and set the min value to 0.5 and the max value to 4. You won't notice the difference on the doughnut too much but on a more complex model you should.
The rest of the ink control rollout is very self explanatory and I'll leave you to play around with that. Make sure you try everything and see what it does. For now don't worry about the swatches that say 'NONE', I will address those in a later tutorial.
I hope this tutorial helped. Keep checking back in the future for the intermediate cell shading tutorial and other 3ds max tutorials.
Below are some more examples of cell shading. These are animated and they are also from the same small scale Japanese strategy game I helped create:


